
How to Make Homemade Butter
There is nothing more delicious that homemade butter on some homemade bread. Believe me once you taste it you won’t want to go back. It’s really easy to make at home and I’ve got two methods below on how I did it. One which was a bit of fun with the kids and the other that I use whenever I see some double cream on the reduced shelf or have some left over in the fridge. So here you go, how to make homemade butter.

Making Butter at Home
Butter is so simple to make at home and actually can be more affordable than buying it in the shop. It also has a much fresher and richer taste in my opinion. I wish I could make my own butter and use it in all my cooking but I do use it especially when making homemade flavoured butters. I’ll share some recipes for them very soon.
All you will need is some double cream or heavy cream and that’s it. So simple and easy to make. Check the reduced shelves for double cream, especially if it’s not something that you would normally buy, that is nearing the sell by date as this is ideal. And no you don’t have to worry that it is nearing the sell by date as this is only relevant to the double cream and not to the butter that you will make.
We sometimes use it in cooking so any leftover I will make butter out of and use in my cooking as well.
Read Next: How to Make Sun-Dried Tomatoes at Home
Using a Stand Mixer to Make Butter
I must admit that this is my preferred method, it’s so much less work for me which means I can often get on with other things at the same time.

Ingredients for Making Butter
- Double Cream
How to Make Butter

- Pour the double cream into the stand mixer bowl
- Start of slowly so that the cream doesn’t spray everywhere and mix it up. The whisk or flat beater both work really well for this.
- Then let it work it’s way through the different stages. You want to have your stand mixer on a medium speed so that it doesn’t burn out.
- The cream as it mixes will go through a whipped cream stage carry on. It takes a time – it was about 8 minutes last time I made some with the mixer on a medium speed.
- Suddenly though the buttermilk will separate out and you will have butter collecting at the bottom.
- Now pour off the buttermilk and save this – it’s ideal for so many recipes.
- Take the butter and rinse it with cold water. Squeeze it and squish it. You will see that there is a lot of buttermilk still in the butter.
- Continue rinsing until the water is clear.

Then wrap in parchment paper and store – you can store in the fridge or in the freezer.

Read Next: How to Store your Homemade Butter
Making Butter with Kids
This is a bit of fun – you’re going to need a jar with a lid that is firmly attached and the cream
- Fill the jar with the cream and secure the lid.
- Now shake… shake some more and shake even more
That’s it just carry on until the butter is formed. You can add in a clean marble to speed up the process slightly if you wish.
Why Make Butter
Making your own butter and using it for cooking has several benefits. Like I said the flavour is so much better, but it also has nutritional benefits as well including containing some of the essential vitamins for good health. Yes, it does take a little extra time but, if you have cream that you won’t use or find it on the reduced shelf in the supermarket then combined with your homegrown herbs it’s takes the flavour to the next level.
Recipes with Homemade Butter
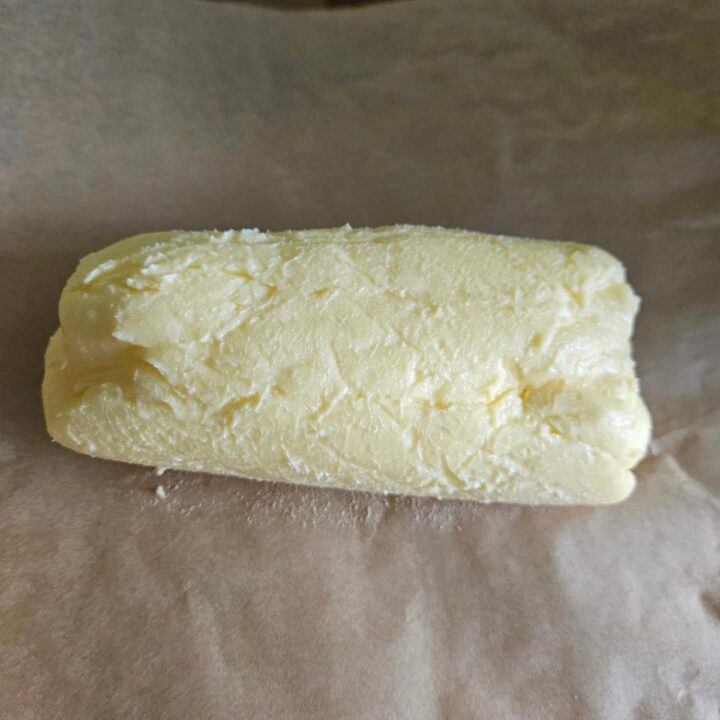
Homemade Butter
Easy recipe how to make homemade butter
Ingredients
- Double Cream
Optional
- Good quality sea salt if you want salted butter
Instructions
- Pour the double cream into the stand mixer bowl
- Start of slowly so that the cream doesn't spray everywhere and mix it up. The whisk or flat beater both work really well for this.
- Then let it work it's way through the different stages. You want to have your stand mixer on a medium speed so that it doesn't burn out.
- The cream as it mixes will go through a whipped cream stage carry on. It takes a time - it was about 8 minutes last time I made some with the mixer on a medium speed.
- Suddenly though the buttermilk will separate out and you will have butter collecting at the bottom.
- Now pour off the buttermilk and save this - it's ideal for so many recipes.
- Take the butter and rinse it with cold water. Squeeze it and squish it. You will see that there is a lot of buttermilk still in the butter.
- Continue rinsing until the water is clear.


